REVO Ultra: Event Recording
There is a great deal of types and options available to use when it comes to event recording: motion, camera recording linkage, uploading, etc.
Here is where how to setup and configure event recording.
Motion Detection
Let's start with the most basic: Motion Detection.
Before we jump in, understand the purpose of motion detection is to monitor an area that is NOT supposed to have ANY movement. This is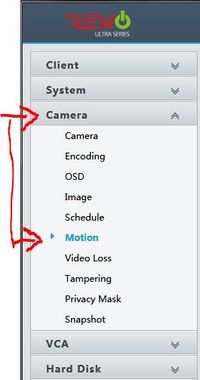
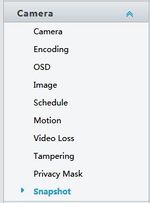
Motion can be configured by navigating the menu to "Camera", then
"Motion".
Motion detection is on and uses the full entire scene by default.
In order for the camera to first detect motion, the GRID area MUST be displayed on the camera image Video currently only works via internet explorer via plug-in.
Not Chrome, not Edge, not Firefox, it must be Internet Explorer to get video for the time being.
No GRID = no detection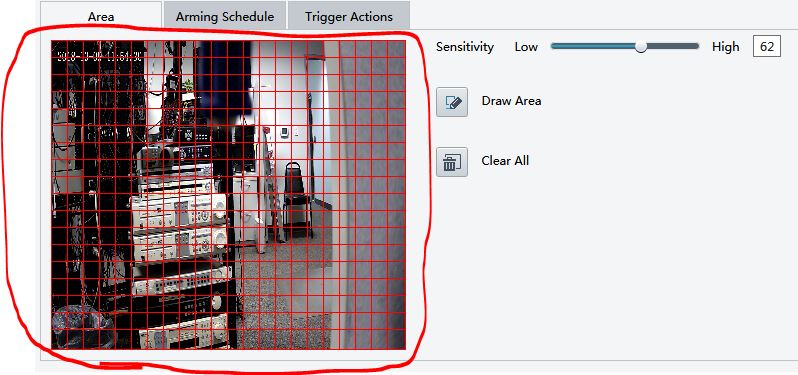
Now, let's talk options.
The additional things you can do on an event are located in the "Trigger Actions" window or tab. Inside the "Trigger Actions" window are some additional options:
- Buzzer
- Send E-Mail
- Alarm Output
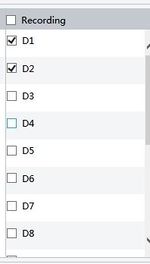
- Recording
- Snapshot
- Go to Preset
Buzzer. Self explanatory. Sounds the internal buzzer.
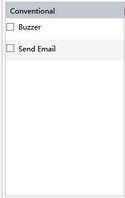
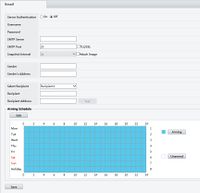
E-mail configuration is located in the Network area in the setup menu.
Alarm output. Sends signal to the alarm output relay of the NVR. Connect siren, etc. to alarm output. (not available on all models)
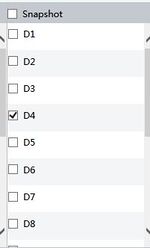
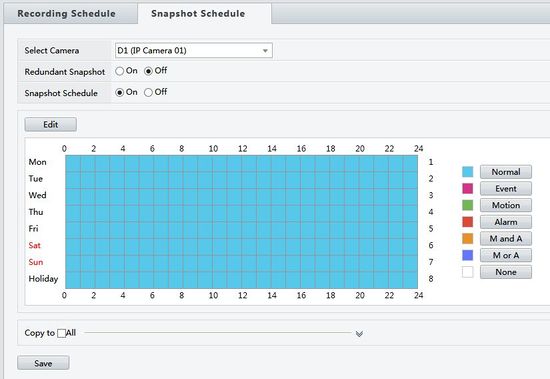
Snapshot is configured in the Snapshot window Camera>Snapshot.
- You MUST have a Snapshot Schedule setup according to what schedule AND type of on what trigger you want (i.e. motion)!
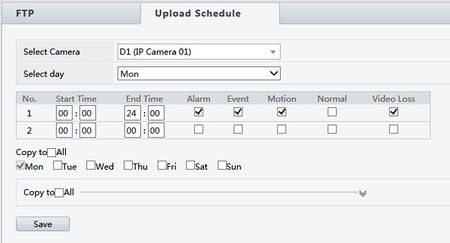
FTP & Upload Schedule
- FTP - File Transfer Protocol:
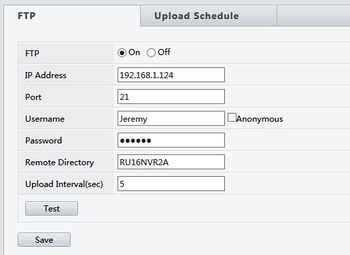
What info you need is basic: IP, port, user name, password, remote directory, and the upload interval. However, configuration of the FTP server varies server to server.
The interval and remote directory are preference but everything else points to the FTP server and must match FTP server settings.
Upload Schedule: